Get Connected
Already have OpenClaw set up? Start from step 3.
Already have Portkey configured? Re‑use your existing provider slug and API key.
Already have Portkey configured? Re‑use your existing provider slug and API key.
If you’re unsure, you can refer this minimal QuickStart path:
openclaw commands). When OpenClaw is set up and running, continue with Portkey integration below.
3. Add your provider to Portkey
Open Model Catalog, click Add Provider, enter your provider API key, and create a slug (for example, gemini).
4. Create a Portkey API key
Go to API Keys, click Create, and copy the key.
5. Open your OpenClaw config
Edit the OpenClaw config file directly:
openclaw.json, add or merge the following snippet:
YOUR_PORTKEY_API_KEY with your actual Portkey API key.Remember to keep
"api" set to "openai-completions" or "openai-responses" — Portkey transforms requests based on the OpenAI API format, and other values from the OpenClaw docs will be incompatible here.
7. Test the integration
After saving the config, run:
@gemini/gemini-2.5-flash model.
For more advanced configuration options, see the OpenClaw docs:
https://docs.openclaw.ai/gateway/configurationhttps://docs.openclaw.ai/gateway/configuration-exampleshttps://docs.openclaw.ai/gateway/configuration-reference
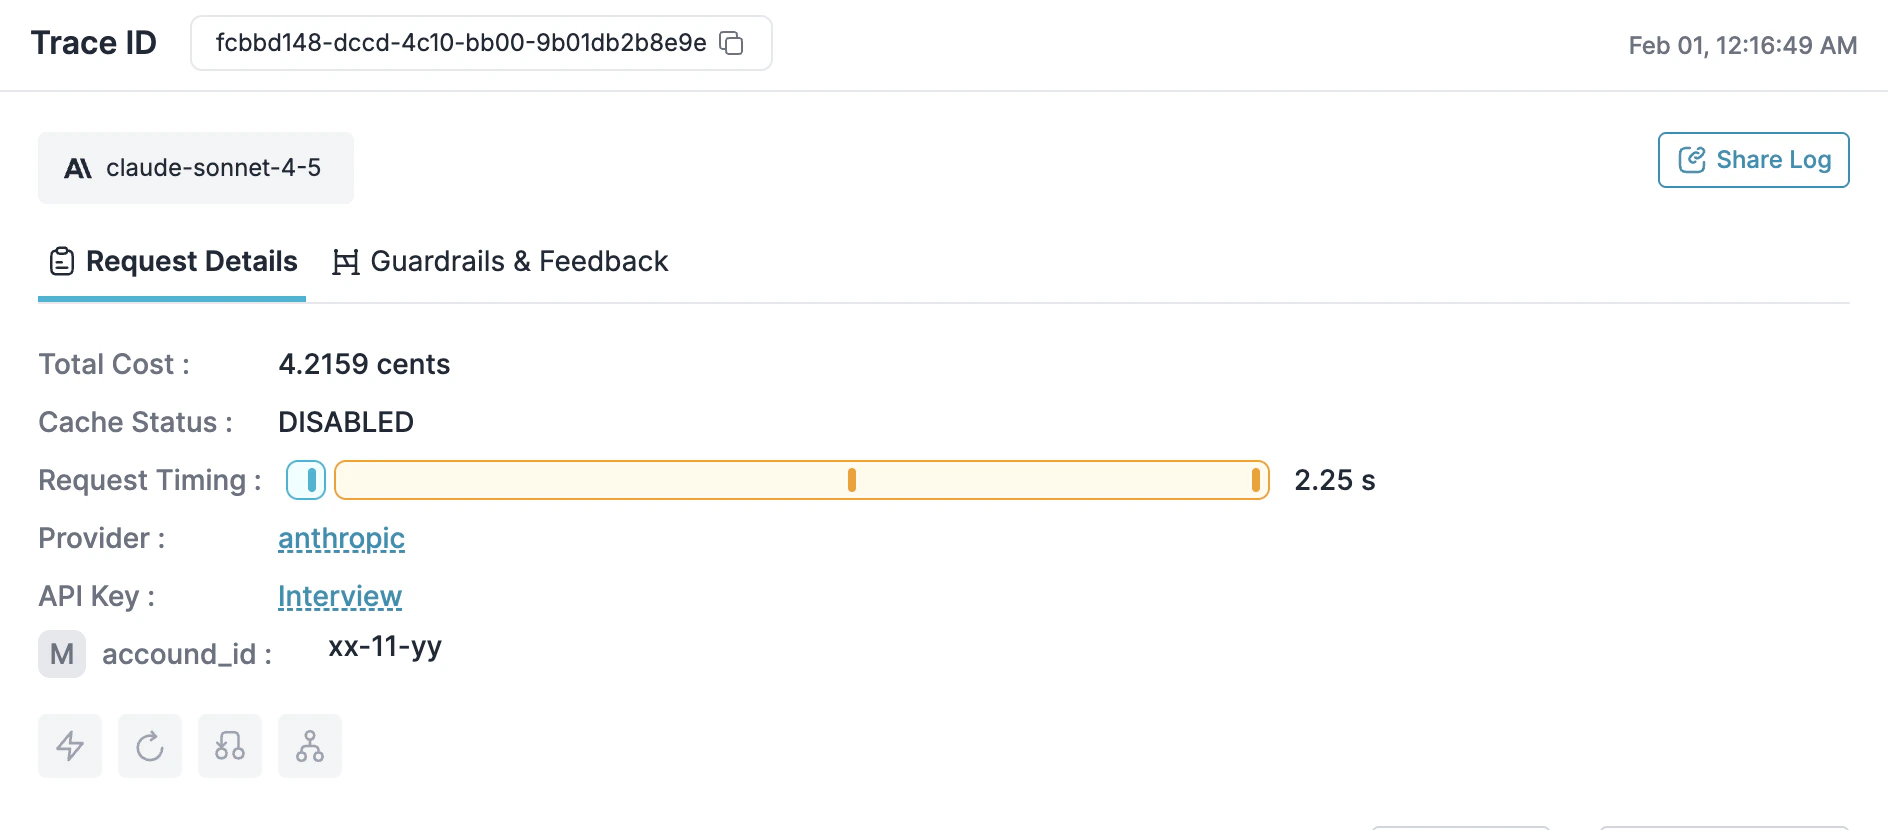
See Your Requests
Runopenclaw and make a request. Open the Portkey dashboard — you should see your request logged with cost, latency, and the full payload.
Add More Models
Configure Models
Add multiple models from any provider you’ve configured in Portkey.You can then refer to them from your agent config using
primary and fallbacks.If you only want to use a single model, set it in
primary without having anything in fallbacks.
primary and fallbacks to control routing:
- Primary traffic goes to
portkey/@mistral/open-mixtral-8x7b. - Fallback traffic uses
portkey/@gemini/gemini-2.5-flashwhen the primary fails.
If you want to use just one model at a time, set only theprimaryfield.
Track with Metadata
Add headers to group requests by session or tag by team/project: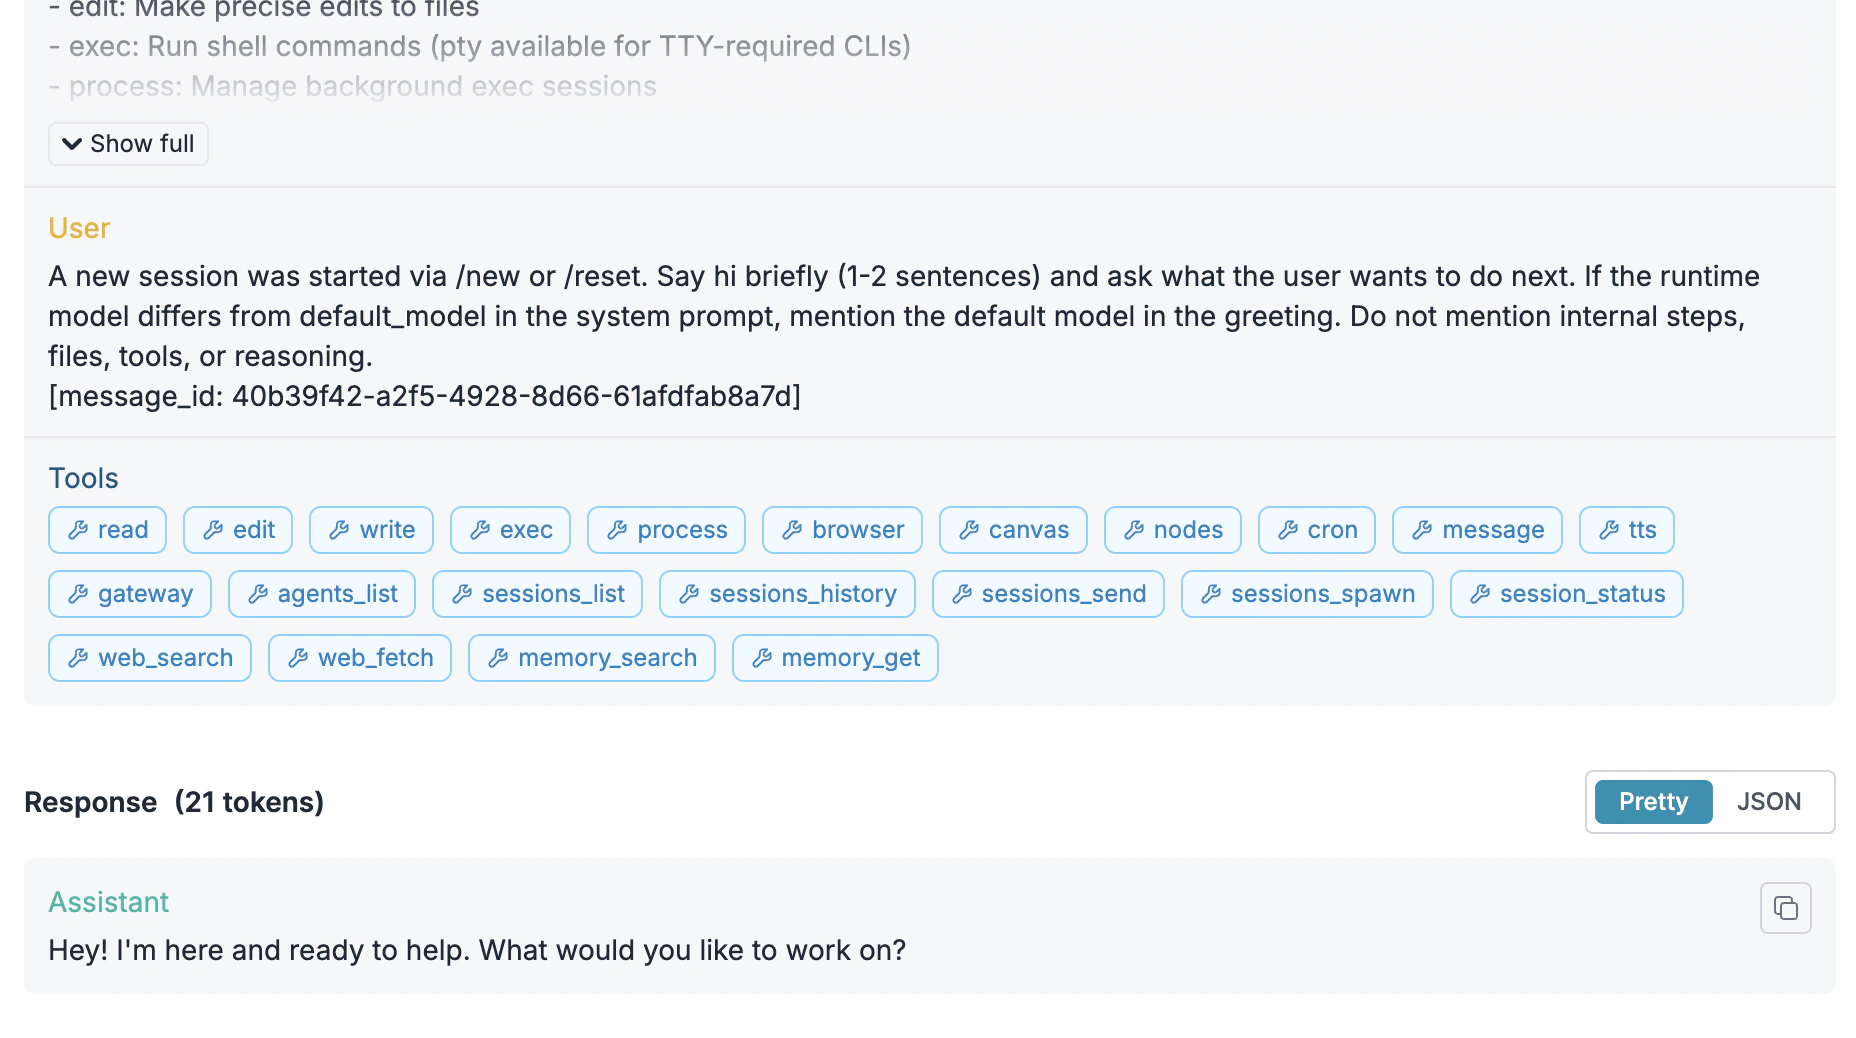
Make It Reliable
Create configs in Portkey Configs and attach them to your API key.From the Portkey dashboard, open Configs, create a config, and copy its Config ID from the config details page. You can then pass this Config ID from OpenClaw by adding a header in your
openclaw.json:
portkey-dynamic is a non-existent model in Portkey’s Model Catalog. Instead, your Portkey Config (referenced by x-portkey-config) decides which real provider/model to call.Once you’ve wired in the Config ID header, you can iterate on different config JSONs in the Portkey UI (failovers, retries, routing rules, etc.) without changing your OpenClaw setup. Below are example config payloads you might use inside Portkey:
- Failovers
- Retries
- Load balancing
- Caching
Automatically switch providers when one is down:
Control Costs
Budget Limits
Set spending limits in Model Catalog → select your provider → Budget & Limits:- Cost limit: Maximum spend per period (e.g., $500/month)
- Token limit: Maximum tokens (e.g., 10M/week)
- Rate limit: Maximum requests (e.g., 100/minute)
Guardrails
Add input/output checks to filter requests:Roll Out to Teams
Attach Configs to Keys
When deploying to a team, attach configs to API keys so developers get reliability and cost controls automatically.- Create a config with fallbacks, caching, retries, and guardrails
- Create an API key and attach the config
- Distribute the key to developers
Enterprise Options
Self-hosting
Self-hosting
- SaaS: Everything on Portkey cloud
- Hybrid: Gateway on your infra, control plane on Portkey
- Air-gapped: Everything on your infra
Authentication
Authentication
Custom pricing
Custom pricing
Override default pricing for negotiated rates or custom models in Model Catalog → Edit model.
Troubleshooting
Configs
Routing strategies
Observability
Logs and analytics
Guardrails
Content filtering
Budgets
Spending controls